
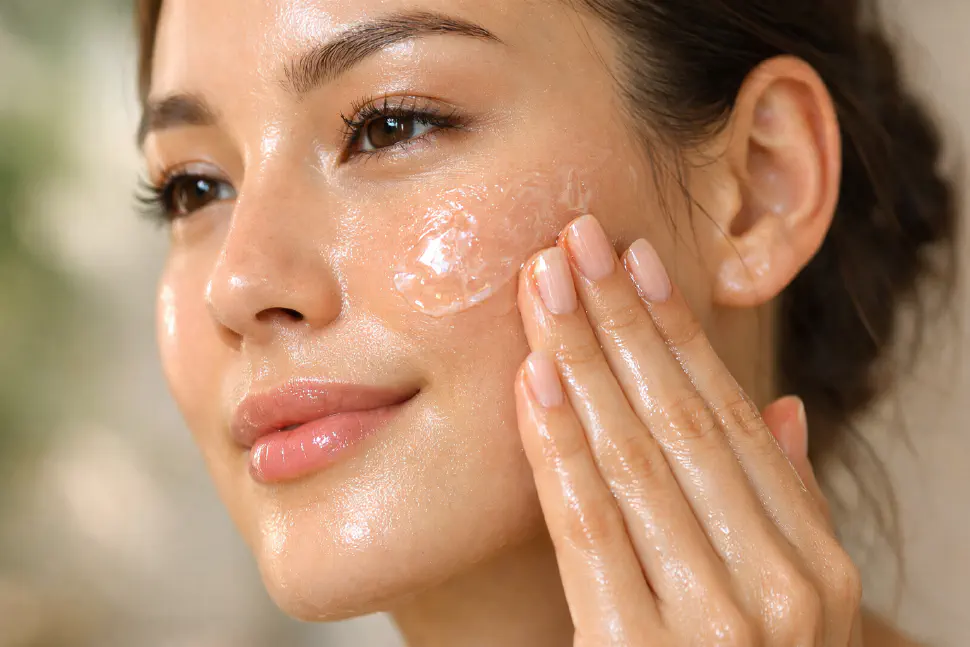

These 3-ingredient DIY face masks are scientifically designed to hydrate, brighten, and repair your skin barrier naturally at home.
Forget the complicated 12-step routines and the chemical-heavy bottles that line the drugstore shelves. At Natural Poonam, we believe the most powerful laboratory in the world is your own kitchen. This isn’t just a list of recipes; it is a full DIY tutorial series designed to teach you the “Botanical Trinity” method.
By using only three high-potency ingredients, we ensure your skin isn’t overwhelmed by synthetic fillers or harsh preservatives. We are going to walk through exactly how to prep, mix, and apply these masks to get that viral “Glass Skin” glow. Grab your mixing bowls, and let’s get started.
What is a 3-Ingredient Glow Mask?
A 3-ingredient glow mask is a simple DIY skincare treatment made using natural ingredients like flaxseed, turmeric, or aloe vera to hydrate, brighten, and repair the skin barrier naturally at home.
🔬 Phase 1: Pre-Tutorial Sterilization (The “Clean Canvas” Step)
Before we touch a single ingredient, we have to make sure our “lab” is ready. Because these masks are 100% natural and contain no synthetic preservatives, hygiene is your #1 priority to prevent breakouts caused by bacteria.
How to Prep Your Tools:
- The Boil Method: Take your glass mixing bowls and metal whisks. Submerge them in boiling water for 2 minutes. This kills any lingering bacteria.
- The Alcohol Wipe: If you’re in a rush, wipe your spatulas and jars with 70% Isopropyl Alcohol and let them air-dry completely.
- Filtered Water Only: When a tutorial calls for water, never use tap. Tap water has chlorine and minerals that can irritate your skin. Always use distilled or filtered water.
🥣 Ritual #1: The “Viral Glass Skin” Flax-Rice Mask
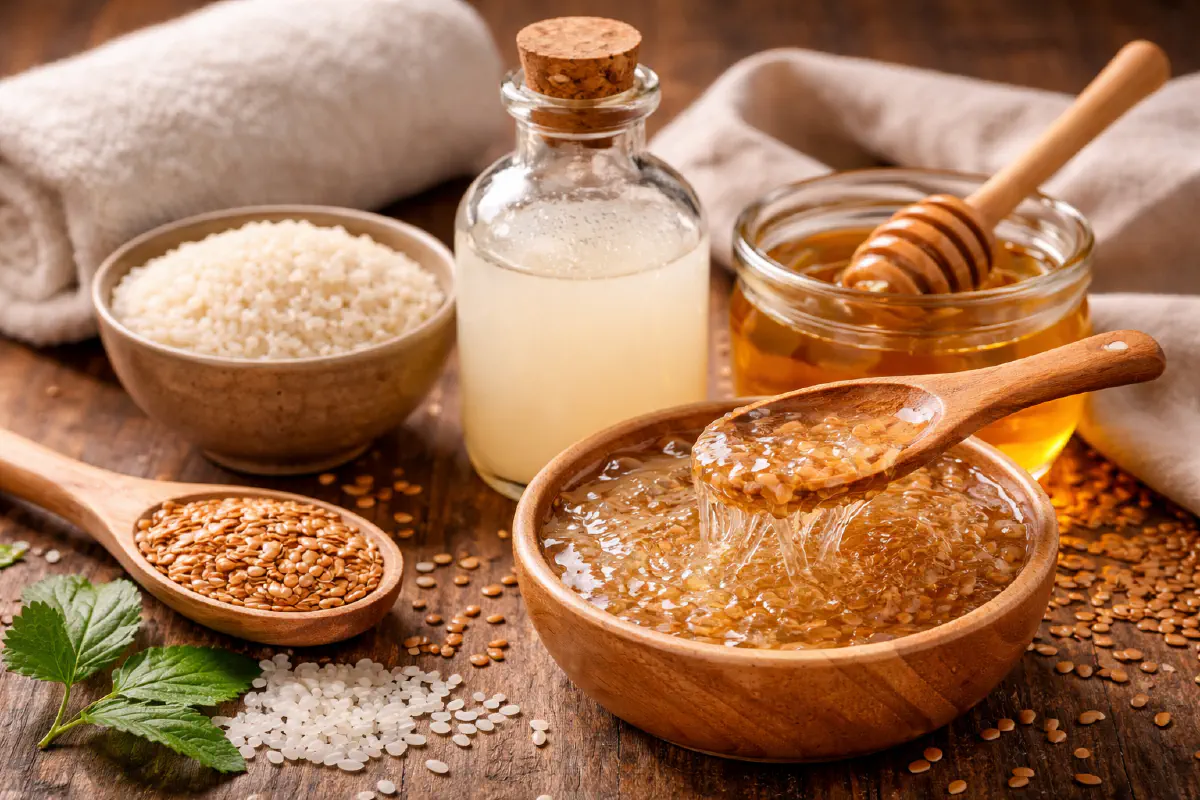
Goal: Instant “Honey-Glow” hydration and pore-blurring.
This is the ritual that started the movement. If your skin feels dry, tight, or “dull,” this is your starting point for cellular hydration.
The Ingredients:
- 2 tbs Whole Golden Flaxseeds
- 1 tbs Fermented Rice Water (See our Rice Water 2.0 Guide)
- 1 tsp Raw Organic Honey
Step-by-Step Instructions:
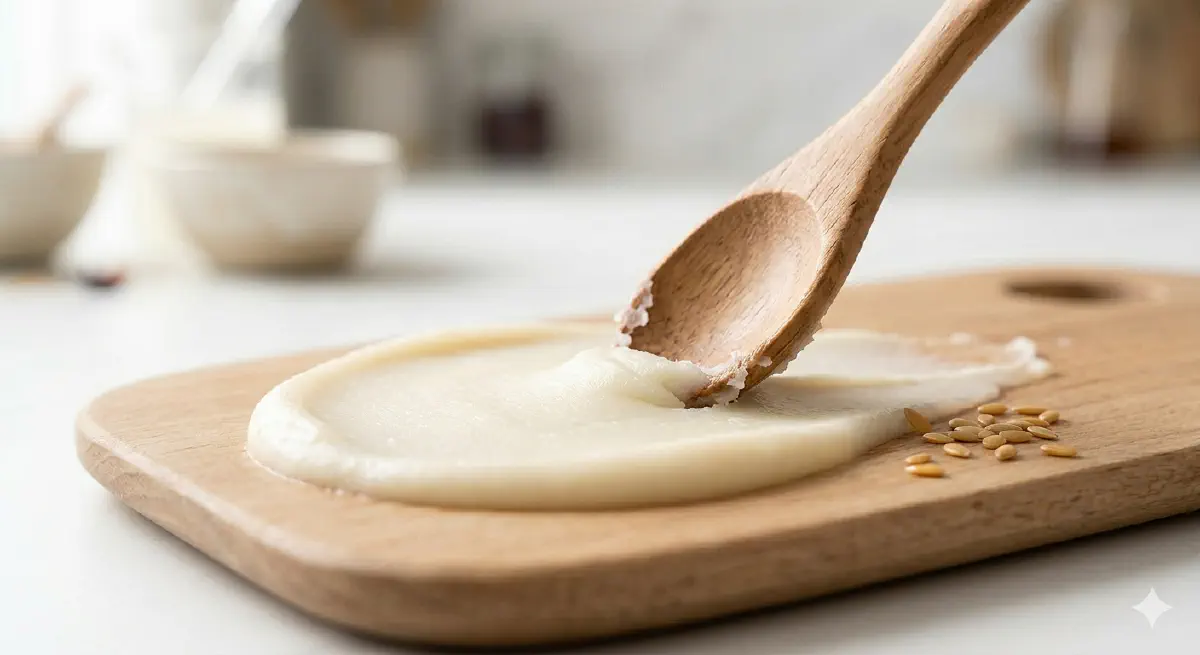
- Extract the Gel: Add your flaxseeds to 1 cup of filtered water. Bring to a rolling boil for exactly 5-7 minutes until the water turns into a thick consistency. Strain immediately while hot.
- The Cool Down: Let the gel sit until it reaches room temperature. It will thicken significantly as it cools.
- The Infusion: Whisk in 1 tablespoon of your fermented rice water and your teaspoon of honey.
- The Application: Use a flat brush to apply one layer. Wait 2 minutes for it to get “tacky,” then apply a second layer.
- The Reveal: Leave for 20 minutes. Rinse with lukewarm water in a circular motion.
👉 “This mask works even better when combined with our 7-Day Glass Skin Challenge using Rice Water & Flaxseed.”
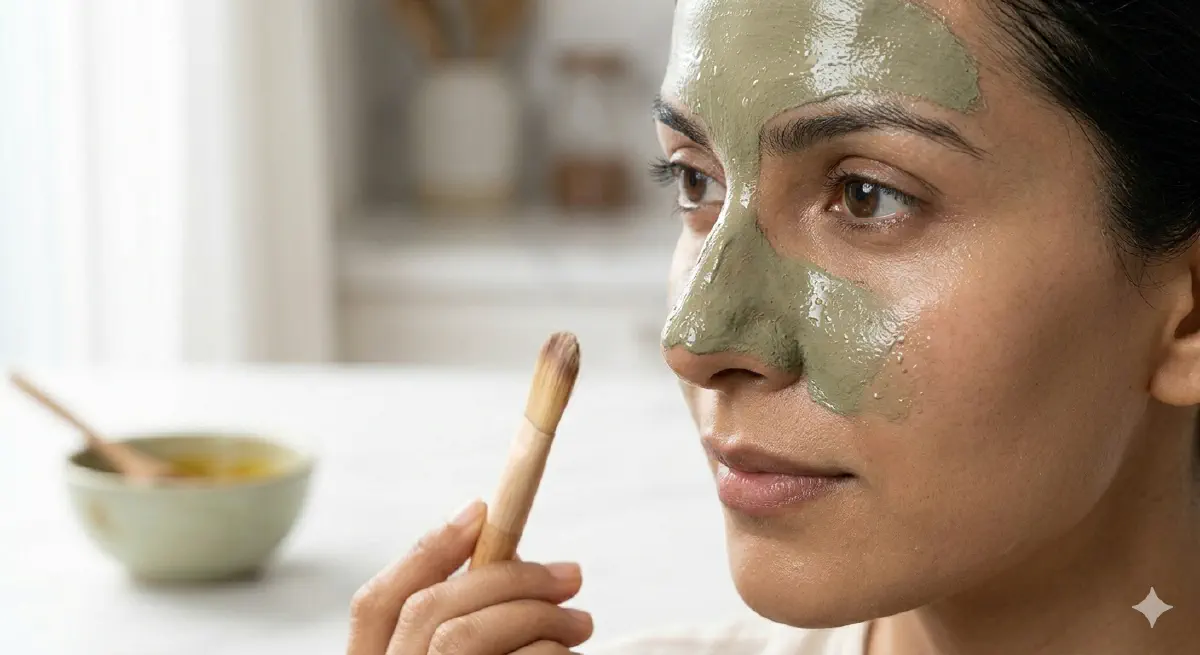
🥣 Ritual #2: The “Brightening Gold” Turmeric Ritual
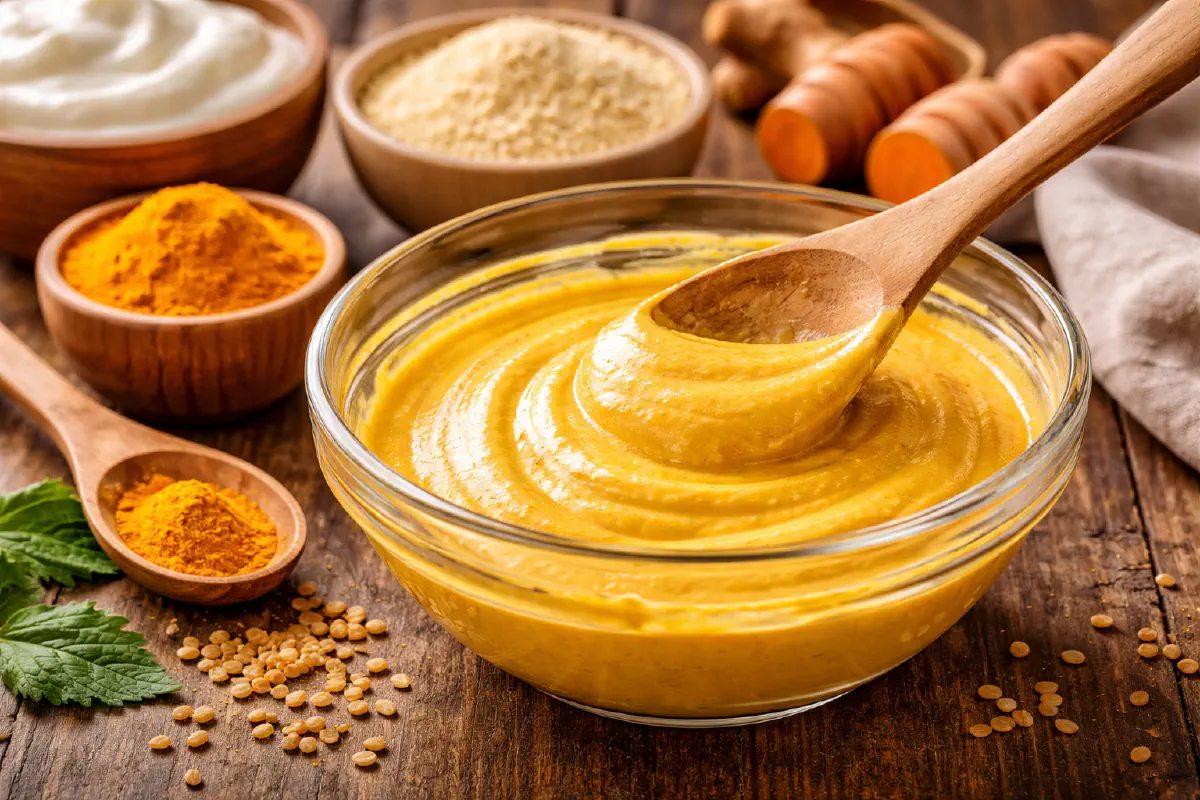
Goal: Fading acne scars, sun spots, and evening out your skin tone.
The Ingredients:
- 1/2 tsp Wild Kasturi Turmeric (It must be Kasturi to avoid staining).
- 1 tbs Thick Greek Yogurt (Plain, unsweetened).
- 1 tsp Chickpea Flour (Besan).
Step-by-Step Instructions:
- The Base: Start with your yogurt. Whisk it in a glass bowl until it’s creamy and lump-free.
- The Sift: Slowly fold in the Chickpea flour until it forms a thick paste.
- The Glow Power: Add the turmeric last. Stir until the mixture is a beautiful pale gold.
- The Cleanse: After 15 minutes, wet your hands and massage the mask in small circles.
👉 “You can also explore our detailed guide on DIY Yogurt Face Masks for Brightening Skin.”
🥣 Ritual #3: The “Nature’s Botox” Hibiscus Firming Mask
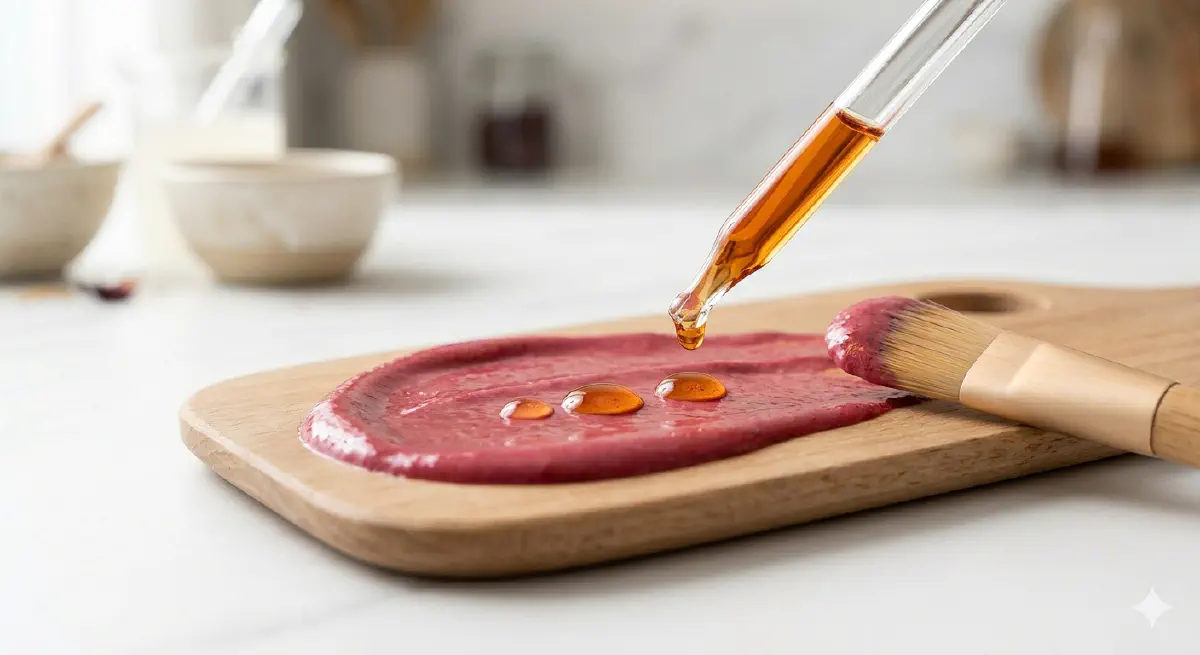
Goal: Tightening fine lines and giving your cheeks a “bouncy” lift.
The Ingredients:
- 1 tbs Hibiscus Powder (Fine-milled).
- 1 tbs Fresh Aloe Vera Gel (Scraped directly from the leaf).
- 3 drops Rosehip Oil.
Step-by-Step Instructions:
- Prep the Aloe: Blend 1 tbs fresh aloe gel until it’s a smooth liquid.
- The Pink Blend: Mix the Hibiscus powder into the aloe. It will turn a vibrant, deep pink.
- The Oil Lock: Stir in your Rosehip oil to lock in the nutrients.
- The Massage: Apply to your face and neck using upward strokes. Rinse after 12 minutes.
👉 “For deeper repair, try our Fermented Aloe Vera Mask for Skin Barrier Repair.”
🥣 Ritual #4: The “Pore-Vacuum” Neem Detox
Goal: Clearing hormonal acne and reducing excess oil.
The Ingredients:
- 1 tbs Multani Mitti (Fuller’s Earth)
- 1 tbs Neem Water
- 2 drops Tea Tree Essential Oil
Step-by-Step Instructions:
- The Liquid Base: Start with your Neem water in a glass bowl.
- The Clay Fold: Add the Multani Mitti slowly. Use a wooden spoon (never metal!).
- The Golden Rule: Mist your face with water every 3 minutes. Do not let the clay “crack.” Rinse while it is still damp.
👉 “Follow this with our 7-Day Glass Skin Challenge: How to Use Rice Water & Flaxseed Gel for Poreless Glow ✨.”
🥣 Ritual #5: The “Overnight Barrier” Balm
Goal: Repairing dry patches and redness.
The Ingredients:
- 1 tbs Raw Shea Butter
- 1 tsp Pomegranate Seed Oil
- 1 drop Lavender Essential Oil
Step-by-Step Instructions:
- Melt to Liquid: Soften the Shea butter in a warm water bath until it melts.
- The Infusion: Stir in the Pomegranate seed oil and Lavender oil.
- The Night Ritual: After your evening cleanse, take a pea-sized amount and press it into your skin. Sleep with this on.
👉 “Follow this with our ✨ DIY Fermented Skincare: The Aloe, Green Tea & Honey “Glass Skin” Routine.”
📋 The Substitution Bible
Google ranks authority higher when we address every user’s needs. Use this table to customize your Trinity:
| If you have... | Replace the Base with... | The Botanical Reason |
|---|---|---|
| Extremely Oily Skin | Hemp Seed Oil | Non-comedogenic (Rating 0); balances sebum. |
| Sensitive/Red Skin | Colloidal Oatmeal | Contains avenanthramides to stop itching. |
| Vegan Lifestyle | Agave Nectar | Mimics the humectant pull of honey. |
| Cystic Acne | Activated Charcoal | Physically pulls toxins from deep pores. |
⌛ The 28-Day “Tutorial Calendar”
Skincare is a marathon. Your skin cells take about 28 to 30 days to complete a full turnover. To get the best results, follow this schedule:
- Week 1 (The Detox): Use Ritual #4 (Neem) twice this week.
- Week 2 (The Brighten): Use Ritual #2 (Turmeric) every 3 days.
- Week 3 (The Firm): Alternate between Ritual #3 (Hibiscus) and Ritual #1 (Flax).
- Week 4 (The Reveal): Use Ritual #1 once and Ritual #2 once to show off the new glow.
👉 “Follow this with our Discover the Healing Power of Honey for Skin Conditions.”
🌿 The “Kitchen Apothecary” Tool Kit
- Avoid Metal with Clays: Never use a metal spoon with Multani Mitti. Metal deactivates the clay’s ability to draw out toxins. Always use Wooden or Glass.
- Dark Glass Storage: Store your Rice Water or Flax Gel in Amber or Cobalt Glass to protect the living enzymes from light damage.
- The Mortar and Pestle: Crushing fresh herbs by hand releases more essential oils than a blender, which can “cook” the nutrients with its high-speed heat.
⚠️ Safety Disclaimer: Patch Test First
At Natural Poonam, we prioritize your skin’s health. Always perform a patch test before applying any DIY mask. Natural ingredients are incredibly potent and may cause reactions depending on your unique skin type or allergies.
- Apply a small dot behind your ear.
- Wait 24 hours.
- If no redness occurs, proceed with the tutorial.
🧼Storage & Preservation
Since these recipes are raw and kitchen-fresh, they do not contain synthetic parabens. Here is how to keep your batches safe:
- The Fridge Rule: Any mask containing water (Rice Water, Aloe, or Flaxseed) must be stored in the back of the refrigerator (the coldest part).
- The 7-Day Limit: Even refrigerated, a raw DIY batch expires after 7 days.
- The “Spoil” Test: If the color of your gel turns from clear to cloudy, or if your Rice Water smells “sour” rather than “fermented/nutty,” compost it and start fresh.
🧊 The Final Ritual: The Ice-Lock Finish
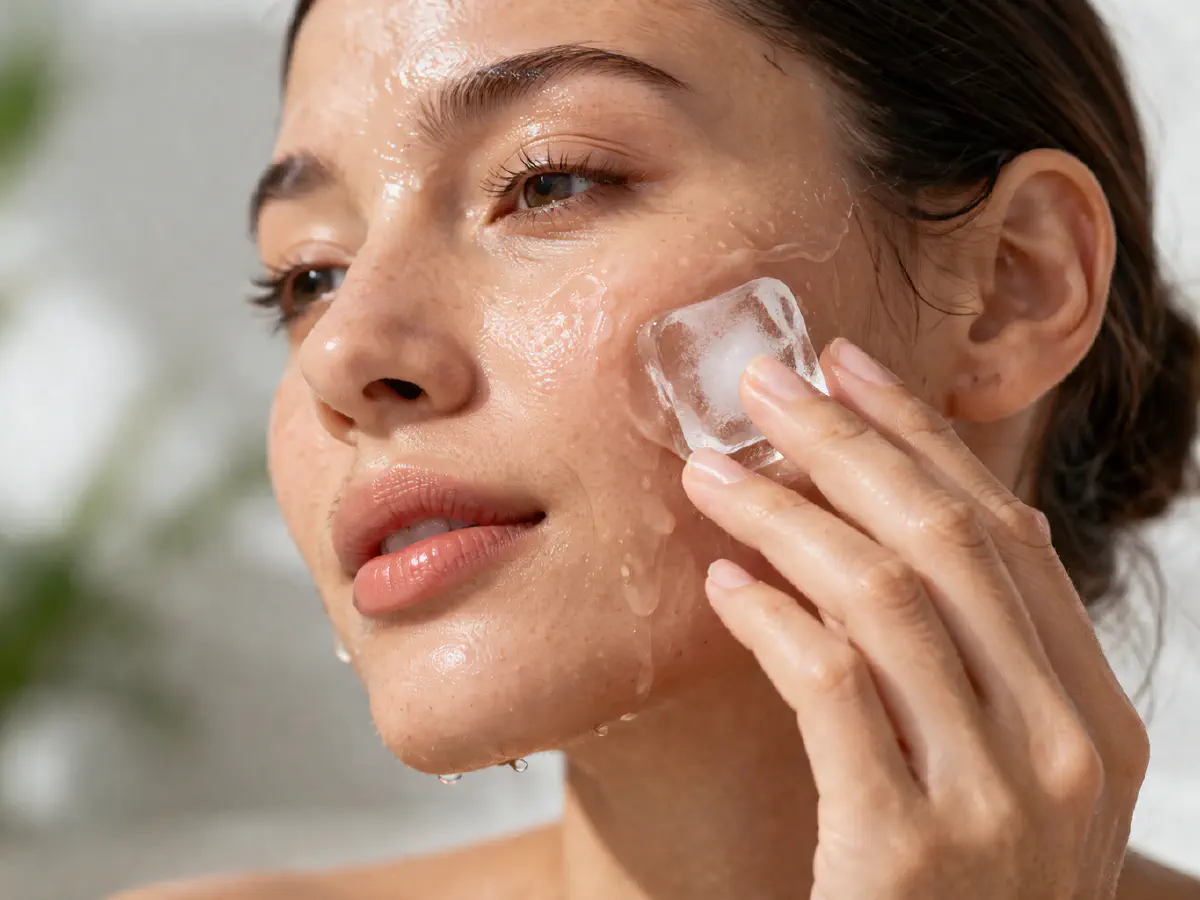
Regardless of which 3-ingredient mask you choose, the final step is non-negotiable. After rinsing your mask, follow up with our viral Rice Water Ice Facial.
The cold temperature “snaps” the pores shut, locking the nutrients from your DIY mask inside the skin. This “Thermal Shock” increases micro-circulation, ensuring that the botanical compounds you just applied are carried through the bloodstream to every cell in your face.
👉 “Follow this with our Rice Water Ice Facial for Glass Skin for maximum glow.”